
Improving Your MS Word Tables Part 3
Welcome back to our Improving Your MS Word Tables series! In Part 1 and Part 2, we focused on borders that put the data to the front. Let’s continue with more suggestions.
Rows and Spanning
If your table spans onto the next page, you can help the reader by repeating the headers at the top of each new page: highlight and right-click on the header row, then click on Table Properties.

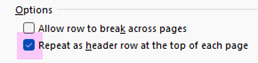
Uncheck the default Allow row to break across pages. (This feature is rarely needed.) Normally, keeping all of the data in a cell on the same page increases clarity—no need to flip to the previous page to see the rest of the data in the row.

Then, highlight the row(s) that contain your headers and check Repeat as header row at the top of each page.
If your table spans multiple pages, the row(s) you specify as the header will repeat at the top of each page; again, no need to flip to the previous page to see the header.
Aligning a Table on a Page
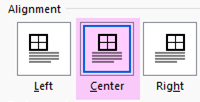
To set the horizontal location on the page (left, center, or right), hover your cursor over the table and right-click on the cross in the upper left corner.

Select Table Properties.

The window defaults to the Table tab.

Depending on your page’s layout, select Left, Center, or Right alignment.
Text Wrapping
The default is None. Verify this option is selected.

If some table in your document will not stay where you try to put it, no matter what other adjustments you make, check to see if Around is selected. Changing Text wrapping to None will probably allow the other adjustments to work.
To clarify, setting text wrapping to Around allows the text to surround the table. Setting text wrapping to None forces the text to only appear above and below the table.

Take charge of your table formats: look at them with a critical eye and consider how you can make the data easier to interpret.
Tell us how you maximize clarity in your tables!
Need Help With Your Tables?
PAI Consulting offers professional editing services to make your documents stand out.
Contact us today for a consultation and let our expert editors help you achieve clarity and impact.
Contact us for a consultationBack to Stet Happens: All Things Editorial home.
Do you have questions or concerns about editorial matters? Share them with us!
PAI Consulting | Helping you succeed. Learn more.
Any opinions expressed in this article are those of the author and not the opinion of PAI Consulting. In addition, this article may contain links to third-party websites. PAI Consulting does not endorse or make any representations about them, or any information, software, or other products or materials found there, or any results that may be obtained from using them.